Rideau Lake: Relaxation, Foodamania and a “Touch” of Tequila


Rideau Lake

If I had to pick a favourite past time of my fellow countrymen and women, I think it would be the weekends at the cottage. Until recently, I was a cottage virgin, even a cottage country virgin! It was only recently I’ve visited Tobermory, which is considered by many as one of the nicest cottage destinations. And then I asked myself, why haven’t I done this earlier?
A few days ago, our little group got together and spent the long weekend at the lovely cottage/cabin on Rideau Lake, about 50 km away from Kingston. It’s set right on the water, which was usually luke warm, and although some of us got bit by the naughty sunfish, we spent most of our time lounging in or by the water. The above is the view from the cabin.

Pancetta Fritatta

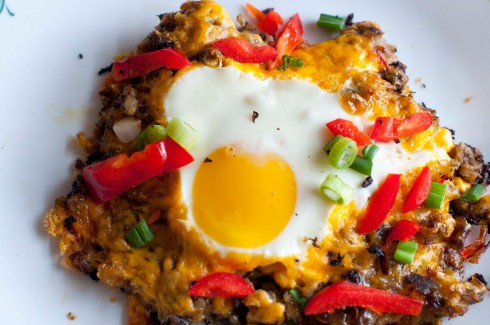
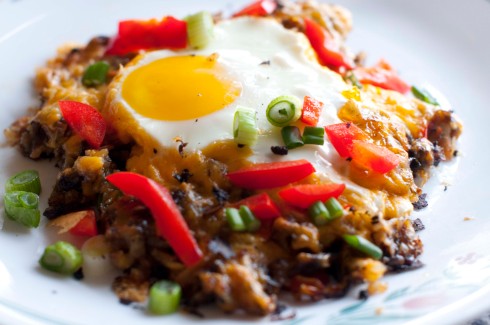
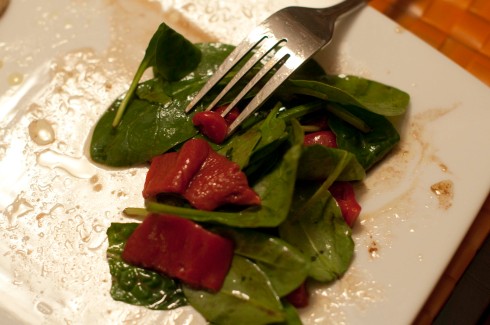
We split up making our meals, and the second morning, it was mine and D’s turn to make the lovely fritatta above.  Fritattas are always such a crowd pleaser, and the best thing about them is that they are super quick and easy.  I sauteed some red peppers, mushrooms and pancetta, while D scrambled the eggs and added shredded mozzarella.  While I was cutting the peppers I noticed they made these cute flower shapes, so I decided to keep them as decoration for the top.  The eggs are then poured into the pan, stirred around a bit and into the oven it goes for about 20 minutes or until it sets.  Top with more mozzarella, let it melt and serve!

Pancetta Fritatta

We used 24 eggs for 8 people, which looked like it was a lot – the pieces were super tall, but there was none left! Although, that is mostly because we have DM on our team 🙂

Fritatta loves strawberry

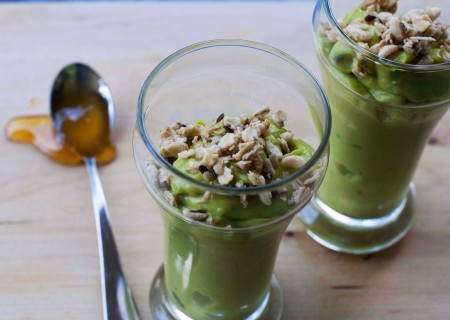
And as if we didn’t have enough food, there was also delicious fruit salad!

Fruit Salad

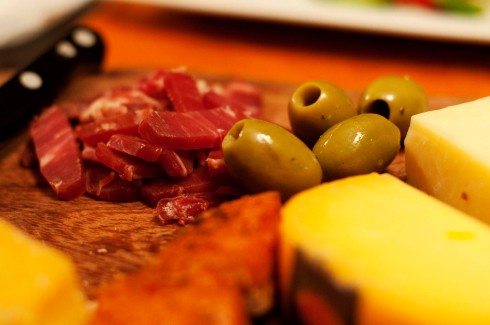
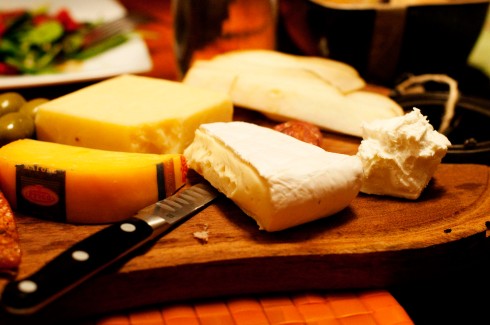
Our first dinner of the cottage weekend was prepared skillfully by DM. He calls it heart attack, or as some would call it – a really really fancy Mac and Cheese. There was several kinds of cheeses, heavy cream, yummy creminis and Panko topping.  I think we all agreed he had won the weekend with this yumminess! (recipe pending)

Heart Attack on a Plate

And, because this group likes to eat, we also had grilled corn, courtesy of DVG.  Back home, corn is grilled without the husk, right on the fire and it comes out slightly charred but smoky and delicious.  I haven’t seen it done this way in Canada.

Sweet Corn

The nights were spent lounging on the terrace until the wee hours of the morning, watching the candles blow in the wind, being wildly inappropriate (thank God the neighbours’ house is out of ear’s reach!), drinking way too much tequila and laughing uncontrollably.

Candles in the Night

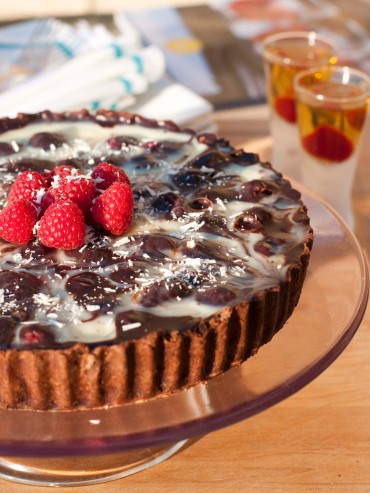
For me, the most delicious thing of the entire weekend was C’s peach pie.  I’m probably biased because I love sweets, and even more ripe and sweet peaches!  C made this srumptious creation, so skillfully (she thinks her dough skills are not so good, but I can put this insanity to rest once and for all!), and it came out looking like something out a fairy tale! And, it was calling my name!  I wished there were two!  The recipe is generously shared by our dear C below.  Thank you!

Peach Pie

Super awesome peach pie was gone in minutes!

Peach Pie

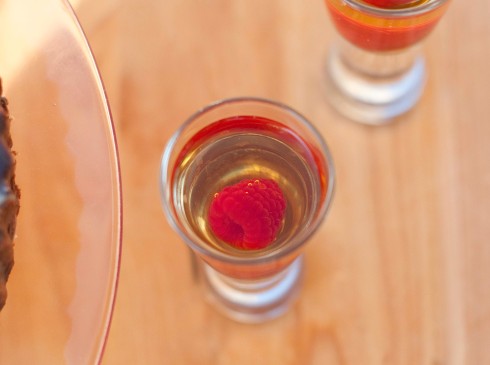
Another peach dessert was being prepared by my dearest DVG, and it took all day for the peaches to be soaked in rum and balsamic vinegar, before they were put on the grill that evening.  They came out soft, juicy and with slight touches of rum.  Yum!

Rum Peaches

And while the others were enjoying some necessary terrace time, my dearest DVG was nice enough to pose for me.  Here, you can see his cannonballing skills!

Wheeeee

That evening, B and M made some of the juiciest chicken that I’ve ever had.  Beer can chicken is one of the easiest ways to make your chicken juicy.  The contraption can be bought at any kitchen store, and it basically looks like a stand, fitted for a small beer can (beer can doesn’t come with it).  The chicken is then stood over top of the stand and the beer can, so that the beer can sits safely inside the chicken (let the dirty jokes begin! :)).  The can can be filled with anything.  The two that were made were curry chicken and wine bbq – so the can doesn’t have to necessarily hold only beer.  Make sure you rub the outside with spices that you like and the chicken will come out looking nice and brown like the one below.

Beer Chicken

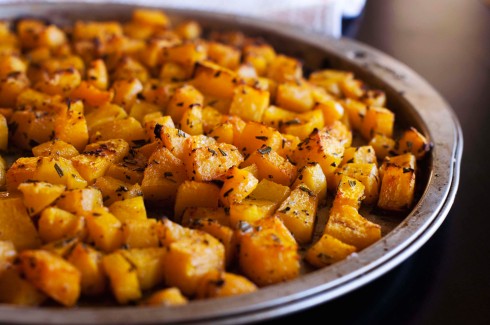
The chicken went well with the grilled red bell peppers and zuchinni below.  The preparation: toss the veggies with salt, pepper and olive oil, put in tinfoil and grill!

Roasted Veggies

The cutest member of the bunch – Bubba.  He even got to swim in the lake!

Bubba

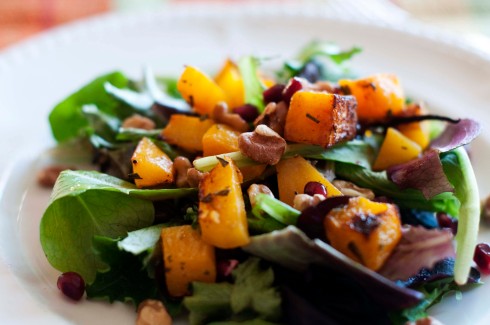
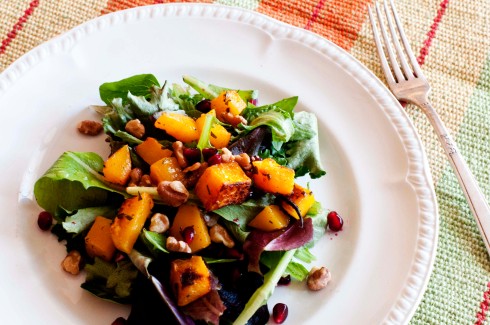
J and M make us delicious cannelloni one evening that was accompanied by these colourful organic beets from J’s garden.  The colours are so vibrant that I couldn’t resist taking so many photos! The red and white one looks like a candycane!

Yellow Beet

Beets from the garden

Sunday was so rainy that we mostly stayed inside, played games and read.  When the rain stopped, I captured this little droplet about to fall to the ground.

Rain Drops

And soon enough, the sun was out again…

Rainy tips

We came away from the weekend, feeling relaxed and serene, such as the photo below.  Good friends, good food and good tequilla – what can be better!?

Decking Out

…………………………………………………………………………………………………………

recipeS

…………………………………………………………………………………………………………………

Peach Pie

Pie crust

Grate 1 cup of butter and freeze

Add to 2 1/2 cups of flour and 1 teaspoonsugar and 1 teaspoon salt.    Combine until it looks like a coursemeal.  At 6 to 10 table spoons of ICE water just until it will holdtogether.   Divide in two, make into balls wrap and refridgerate forat least an hour.

Filling

6 cups peelingand sliced peaches, 1 cup white sugar, 1/2 flour all tossed together.

Roll your crust, fill it with the peachmixture and bake at 450 degrees for 10 minutes and then drop the heat to350 for an additional 30-35 minutes

Take it out and eat the whole thing!

…………………………………………………………………………………………………………………….

 Baked Macaroni and Cheese

  • 1/2 pound macaroni
  • 5 tablespoons butter
  • 3 tablespoons flour
  • 1 tablespoon powdered mustard
  • 3 cups milk (add 1 cup cream if sause is desired)
  • 1/2 cup yellow onion finely minced
  • 1 bay leaf
  • 1/2 teaspoon paprika
  • 1 large egg
  • 10 ounces (300g) sharp cheddar (Balderson 2+ works well), shredded
  • 10 ounces (300g) full bodied cheddar, shredded
  • 2 Hot italian sausages (remove casing, chop)
  • 2 cups Cremini mushrooms, sliced
  • 2 cups assorted wild mushrooms (Oyster, Shiitake, Chanterelle), trimmed, sliced
  • 2 teaspoon kosher salt Fresh black pepper

Topping:

  • 2 tablespoons butter 1 cup panko bread crumbs

Directions

Preheat oven to 350 degrees F. In a large pot, begin boiling salted water.

While the water is heating, melt 1 tbsp of butter at medium in a cast iron pan. Add mushrooms, season with 1tsp of salt, and saute until softened, browned, and slightly scortched. About 10 minutes. Set aside.

Add marcaroni to water and cook to al dente. Drain and set aside when done.

While pasta is cooking, melt another 1 tbsp of butter at medium-high in the same cast iron pan. Add chopped sausage grounds and season with salt and pepper. Sauté and separate chopped sausage into grounds until nicely browned. Set aside.

In a large pot, melt the remaining 3 tbsp of butter. Quickly whisk in the mustard until smooth. Whisk in the flour and keep whisking for about five minutes making sure it’s free of lumps. Stir in milk, onion, bay leaf, and paprika. Simmer for 10 – 15 minutes and remove the bay leaf.

Temper in the egg (this is important). Stir in 3/4 of the cheese. Season with salt and pepper. Mix in the set aside mushrooms and sausage. Fold the macaroni into the mix and pour into a large casserole dish. Top with remaining cheese.

Melt the butter in a saute pan and toss the bread crumbs to coat. Top the macaroni with the bread crumbs. Bake for 30 minutes. Remove from oven and let rest.

New Orleans Cuisine


DSC_0051

New Orleans. There isn’t anyplace else quite like it. Its history, architecture, natural reserves and cultural vibrance are just a few of many reasons to visit this incredible city. But none of these reasons compare to the one thing that New Orleans is most known for – its food. The cuisine of New Orleans has been influenced by French, Spanish, Cajun, Creole, South African, South American and Native American dishes. The amalgamation of all these different cuisines has produced unique dishes such as a muffaletta, poboys, beignets, boudin and jambalaya, among many others.

DSC_0042

Our visit to NOLA started with a hearty breakfast at Slim Goodies Diner in the Garden District. This cash-only local favourite quickly became busy after we were seated. Slim’s motto: “Cooking with Love”. Our choices for that morning were definitely cooked with love – and plenty of it – the portions were bigger than my head :). Above is The Little Goat: Two fresh scrambled eggs with roasted red and yellow peppers marinated in pesto and dash of goat cheese, served over black bean and avocado slices. And of course a biscuit!

DSC_0047

Second choice – Roma: Fresh spinach, mushrooms, tomatoes, onions, garlic, feta cheese. The food was hearty – perfect to start off a long day of walking around and sightseeing.

After Slim’s we decided to check out the local gelateria, just up the street. Sucré is a very cute little place with gelato flavours like coconut basil (to die for!), banana foster and cinammon roll (pictured above). Their cappuccino is also delicious. “Thanks baby, y’all come again, al’right” the girl yelled after me as we were heading out 🙂

DSC_0107

New Orleans is famous for original dishes and food items, one of them being the Muffaletta Sandwich (above). The name Muffaletta stems from the Sicilian word for panini. The Italian immigrants to New Orleans had originated the muffalleta sandwich in 1906 and the Central Grocery store in the French Quarter was the first to sell it. The Muffaletta is usually pretty enormous (1/4 of the sandwich is more than enough – as you can see above) – it’s made on one big round of bread with salami, capicolla, pepperoni, ham, provolone and swiss cheese and olive salad. Olive salad is a signature dish consisting of olives diced with the celery, cauliflower and carrot found in a jar of giardiniera, seasoned wih oregano and garlic, covered in olive oil, and allowed to combine for at least 24 hours. The Muffaletta was a popular work food and the salad was (and still is) a popular condiment as it’s the only one that won’t go bad or rancid in the hot Louisiana weather.

DSC_0116

Another New Orleans favourite (and original) is the flaky fried dough called beignet. Beignets are hand made fritters, deep fried and served with powered sugar. The famous Cafe Du Monde has been serving beignets by the 1000s since the early 1800s. However, we opted for a more authentic experience at Cafe Beignet. The beignets at Cafe Beignet are hand made to perfection and served hot along with another New Orleans favourite – coffee with chicory. There are several Cafe Beignet locations around New Orleans, my favourite being inside the Musical Legends Park – where you can enjoy some afternoon jazz while eating your beignets.

DSC_0120

One of the oldest restaurants in New Orleans – The Old Coffee Pot serves authentic, made from scratch seafood gumbo and jambalaya.

DSC_0123

Anoter New Orleans original are cheap and hearty sandwiches named “Po’boys” (below). These sandwiches are usually made on french loaf type bread, with meat or seafood. The story behind po’boys is that they originated in 1929 during a four month strike of the conductors of the New Orleans street car company. Two former conductors had established a restaurant and decided to give free sandwiches to their former coworkers during the strike. The restaurants’ workers often referred to the workers as ‘poor boys’ and eventually the sandwiches took the same name. In Louisiana dialect, this got shortened to po’boys.

DSC_0131

Pralines: another one of many New Orleans favourites is made with caramelized sugar, butter, cream or buttermilk and pecans. Pralines had originated in 17th century France but more readily available almonds and hazelnuts were used in the French versions. Once the praline was brought over to the Americas by the settlers, the recipe was adapted to use cane sugar and pecans that were plentiful in Louisiana.

DSC_0135

New Orleans enjoys a steady supply of quality seafood which allows its restaurants to change their menus daily in accordance with what’s fresh on the market that day.  One such restaurant is the highly recommended GW Fins. The dish below is one of the delicious appetizers on offer: Wood Grilled Gulf Shrimp with smoked pepper salsa and chipotle butter. The shrimp had a very distinct smoky flavour and a slight kick from the chipotle butter.

DSC_0196

The special for that evening was the Parmesan Crusted Black Drum with Lump crab, Meyer lemon, asparagus, crispy capers and brown butter.  The drum was perfectly flaky and the parmesan crust was a nice complement in the texture.  Presentation was slightly lacking though – I would have preferred plain white plates.

DSC_0202

The second special of the evening was the Sautéed American Red Snapper with shrimp etouffée, jasmine rice and lobster butter.

DSC_0207

Pièce the résistance (and one of the main reasons for coming to GW Fins) was the deep dish apple pie with vanilla ice cream.  The crust was perfectly flaky and buttery – the apples with a hint of cinnamon – ultimate indulgence 🙂

DSC_0210

Of course, no dinner is complete without someone kissing at the table – this time it was the salt and pepper shakers 🙂

DSC_0213

My favourite restaurant that we visited is a local favourite for authentic cajun cuisine – Cochon.  Cochon Butcher is right next door to this popular spot in New Orleans’ business district and the restaurant gets all its meat from here.  The meat is sourced locally as is all the seafood and produce.  The restaurant is super busy and reservations are a must.  It is located in a converted warehouse, and the atmosphere is lively and unpretentious.  The kitchen is open so you are able to see all the chef’s creations being made.  It’s also possible to sit right at the ‘kitchen bar’ to get a better view of the food preparation.

Our first choice of the meal was the Paneed Pork Cheeks with roasted corn grits & tomato salad.  I wasn’t going to leave New Orleans and not try their famous grits – so I thought this was the perfect opportunity.  The pork cheek (a first for me btw!) was deliciously tender – it simply fell off the fork.  The grits were creamy and delicious as expected.  Presentation was immpecable.  I just love the contrast of the red pepper against the pork cheek and the white plate – it’s so vibrant!

DSC_0226

Next up, another local original – Boudin – this time with pickled peppers.  While Boudin is a catch-all name for many kinds of sausages, the Cajun-style Boudin is made from a pork rice dressing (much like dirty rice) which is stuffed into pork casings.  Rice is always used in Cajun-style Boudin as opposed to milk in the French/Belgian version.  Boudin is usually grilled, simmered or braised.

The outside of boudin is crispy and the inside is soft and full of flavour.  

DSC_0231

Veg of the day:  Cucumbers and herbs in vinegar – nice and refreshing complement to all the meat.

DSC_0235

Last but not least, we could not skip the famous collard greens.  Collard greens are a staple side dish in Southern cuisine, typically prepared with other leafy vegetables like kale, spinach and turnip leaves.

DSC_0233

Guilty Pleasures: Lime Cranberry Muffins


Lime Cranberry Muffins

We all have guilty pleasures.  When it comes to food, for me it’s always the baked goods.  Croissants, pastries, breads, muffins – you name it.  Being a girl in her 30s, this is not a good guilty pleasure to have, as you can imagine 🙂  Bakeries are my greatest weakness – the smell of freshly baked bread or croissants – is there anything better in the world?  In  Waterloo, there aren’t many bakeries around (which is maybe a blessing in disguise for my waistline), so the closest I can get to the bakeries back home are cafes and the farmer’s market. 

Lime Cranberry Muffins

This post’s guilty pleasure came unexpectedly from a breakfast visit to the local cafe The Seven Shores.  The Seven Shores promotes the slow food movement and organic local food.  It was founded in 2004 by by local entrepreneurs and eventually evolved to an urban cafe, food market and merchandiser of arts and crafts from artisans around the world.  It was previously located in a small space on Regina and Dupont.  Last December it moved to their new explanded location (previously Generation X).  I have visited the previous location previously and thought the cafe to be a gem: unpretentious atmosphere, friendly staff and amazing pastries. 

Lime Cranberry Muffins

One easy Saturday morning D and I decided to check out the new location.  The first thing that struck me was the amazing countertop they had installed – . thin planks of dark and light wood interchanging to make a sort of striped surface!  The new location is about 3 times the old location with a community room and a small marketplace.  I must say I thought that their old location had a better selection of local produce than what was there now, and I didn’t see any arts and crafts from artisans around the world.  However, this could be due to their recent expansion and not having everything ready yet.  Regardless, we ordered some simple breakfast with eggs, but the real gems were the pastries.  Lime cranberry muffin for D and a strawberry white chocolate scone for me.  Cappucino that I ordered was done perfectly and I was thoroughly impressed by the friendly service.  I had a feeling I was sitting at a cafe somewhere in Europe.

Lime Cranberry Muffins

Lime cranberry muffin – the inspiration for this post – was one of the nicest muffins I have tested in a while – it was fresh, citrusy and light tasting.  The cranberries gave it a slight tartness which was a good complement to the sweetness.  My favourite part was the crystalized pieces of sugar that glistened at the top – super pretty.

Lime Cranberry Muffins

So I decided that I would try to re-create these muffins in my own kitchen.  I found an interesting recipe at My Baking Addiction but it had bluberries instead of cranberries.  I decided to just substitute for cranberries and follow the rest of the recipe.  I wanted the muffins to be super limy so I picked two big limes to zest.  The batter was a lovely light green colour – perfect for spring!  I also put in 50% more cranberries (plus a few on top once in the liners) than what the recipe said.  I bought muffins with cranberries before and many times only found one or two cranberries inside – which is very dissapointing.  So, I decided my muffins would have plenty of cranberries.

The result? Beautiful limey cranberry deliciousness!

Lime Cranberry Muffins

What are your guilty pleasures?  What food can you not live without?  I’d love to hear from you!

…………………………………………………………………………………………………

recipe

………………………………………………………………………………………………….

Lime Cranberry Muffins

  • 1 cup sugar
  • zest of two limes
  • 2 cups all-purpose flour
  • 1/2 teaspoon salt
  • 1/2 teaspoon baking soda
  • 2 eggs
  • 1/2 cup vegetable oil
  • 1 teaspoon vanilla extract
  • 1 cup sour cream
  • 1 cup fresh or frozen blueberries
  • coarse sugar, optional
Directions:
1. Preheat oven to 400 degrees F. Spray muffin pan with nonstick cooking spray or line with paper muffin liners.
2. In a small bowl, combine sugar and lime zest. Mix with clean fingertips until sugar is moistened and fragrant. Set aside.
3. In a medium bowl, stir together flour, salt and baking soda. Set aside.
4. In large bowl, beat eggs and sugar until thoroughly incorporated.  Continue beating while slowly pouring in the oil. Add in vanilla.
5. Stir dry ingredients into egg mixture alternately with sour cream. Gently fold in blueberries. Scoop batter into prepared muffin cups and if desired, top with a sprinkling of coarse sugar.
6. Bake in preheated oven for 20-22 minutes or until a toothpick inserted into middle of muffin comes out dry

Secret Pickle Supper Club Documentary


Yes, you heard it right – The Secret Pickle Supper Club has made a documentary featuring the latest Secret Pickle at the St. Lawrence Market. I recently wrote about my first Secret Pickle experience here, which is now featured in the documentary.

Yours truly is in several shots (5 seconds in, 3:02 min in and 6:17 m in), albeit some of them behind my trusted camera 🙂

This is super exciting!

See the DOCUMENTARY here! Enjoy!

Spring Time Baking Fun: Avocado Pound Cake and Profiteroles with Spiced Mango Mojito Sauce


Profiteroles with Mango Mojito Sauce

I love desserts that are light tasting and fruity – especially in the spring. Everything is in bloom, the brighter weather has started – the energy of the spring is here! The brighter weather makes you want to dress in your pretty colourful clothes that have been burried in the back of the closet for what seems like eternity! It makes you want to party!

Profiteroles with Mango Mojito Sauce

My friend Emily has generously offered me a guest post on her very popular blog about fashion and all things pretty – Party Mix Tape.   She said… make something fun, spring-inspired, something that makes you want to party!
So I thought about fun, bright, light-tasting desserts, and the first one that came to mind was Profiteroles with Mango Mojito Sauce. How can you party without Mojitos? And best of all, it’s in a dessert!

Profiteroles with Mango Mojito Sauce

These little babies I found in my favourite cookbook – Bon Appetit Desserts, and I was very intrigued by the mojito mango combination 🙂
The timing was perfect because this last weekend was also the Orthodox Easter, so I told my mom not to worry about dessert – I would be bringing two!

The dough follows the typical profiterole/cream puff instructions – melting butter with milk, adding dough and cooking it on the stove for a few minutes before adding eggs. The dough should come out soft and sticky. If you have an ice cream scoop, it would be the best way to drop these onto a cookie sheet. They will come out even. Make sure to dip the scoop in hot water between each so they come out easier.  The recipe for the puffs may look a bit involved, but the whole process takes less than 1.5 hours, because you can do the filling and the sauce while the profiteroles are baking, and the assembly is done just right before eating.

Profiteroles with Mango Mojito Sauce

I should mention that this dessert also takes a bit of planning – case in point – mangoes. At least 6 mangoes are required and they have to be soft and sweet. So, buy your mangoes well in advance if you can’t find soft ones. Because the profiterole dough has no sugar and the filling very little, most of the sweetness should come from the mango, so it’s even more important that they are ripe and sweet.

I bought my rock hard mangoes a few days ahead, thinking they would soften in time. Well, they didn’t. And, along with a few other things that I forgot about, like taking the butter out to soften, having an electric mixer and forgetting to buy sugar and limes…this fun baking day wasn’t getting off to a good start. The worst thing was that Easter was tomorrow, I promised my mom I would bake, I promised Emily I would have the guest post done this week, and everything was closed tomorrow! Things had to be done in the next 3 hours! For a calm person, I was seriously freaking out.

Profiteroles with Mango Mojito Sauce

D tried to calm me down, and offered to bring his mixer and go look for ripe mangoes. Half an hour later, and luckily for me, he came back with super soft, super sweet mango heaven 🙂 Everything was back on track again 🙂

The profiteroles puff up when they bake, but stay hollow in the middle – perfect for filling. They can stand for 2-3 days but the longer they sit, the harder they get, so they should really get eaten in the first 1-2 days for maximum freshness.

Avocado Pound Cake

The second recipe I picked was the one I found on Epicurious, and it left me quite intrigued. Avocado. In a pound cake? But, after discovering the delicious avocado pudding a few weeks ago, I decided that it was worth a try.

Avocado Pound Cake

The recipe makes a double batch, and I believe the dough can keep for a few days, or be frozen.
This loaf is the perfect way to use up your ripe mushy avocados (if you don’t want guacamole), and you can use some on top for decoration. My favourite thing about this loaf is that it’s lime green inside – so pretty and so much fun! It’s very moist – perfect for having with tea.

Avocado Pound Cake

I’m excited for the spring and the warm weather and bike rides.

Until next time, happy eating!

Toodles

Avocado Pound Cake

Update:  Check out my guest post on Emily’s PartyMixTape – HERE

…………………………………………………………………………………………………………..

Click on each photo to view the high resolution images.

…………………………………………………………………………………………………………..

RECIPES

…………………………………………………………………………………………………………..

Avocado Pound Cake

Ingredients:
  • 3 cups all-purpose flour
  • 1/2 cup yellow cornmeal
  • 1/2 teaspoon salt
  • 1 1/2 teaspoons baking powder
  • 1 1/2 teaspoons baking soda
  • 3/4 cup (1 1/2 sticks) unsalted butter, softened
  • 3 cups granulated sugar
  • 1 cup plus 2 tablespoons ripe mashed avocados
  • 4 large eggs
  • 2 teaspoons pure vanilla extract
  • 3/4 cup buttermilk
Place a rack in the center and upper third of the oven and preheat to 350 degrees F. Grease and flour two 9×5-inch loaf pans and set aside.  In a medium bowl, whisk together flour, cornmeal, salt, baking powder, and baking soda. Set aside.
 
In the bowl of an electric stand mixer fitted with a paddle attachment, beat butter and sugar on medium speed until light and fluffy, 3 to 5 minutes. Add avocado and beat for another 2 minutes. Stop mixer and scrape down the sides of the bowl as necessary.
 
Add eggs, one at a time, beating on medium speed for 1 minute after each addition. Stop the mixer and scrape down to make sure everything is thoroughly mixed. Beat in vanilla.
 
With the mixer on low speed, add half of the flour mixture. Beat until just incorporated. Add the buttermilk and the remaining flour mixture. Beat until just incorporated. Remove bowl from the stand mixer, and finish incorporating the batter with a spatula.
 
Divide the batter between the pans and bake on alternating racks for 30 minutes. After 30 minutes, rotate racks and bake for another 15 to 25 minutes, or until a skewer inserted in the center comes out clean. Let cool in pans for 20 minutes before inverting onto a wire rack to cool completely.
 
Cake will last, well wrapped, at room temperature for up to 4 days.

…………………………………………………………………………………………………………….

Mango Profiteroles with Mango Mojito Sauce

Ingredients:
Puffs
  • 1 cup whole milk
  • 1/2 cup (1 stick) unsalted butter, diced
  • 1/4 teaspoon salt
  • 3/4 cup all purpose flour
  • 4 large eggs
  • 2 large egg yolks
Filling
  • 2 cups 1/3-inch cubes peeled pitted mango (from about 4 large; see Test-Kitchen Tip below for details)
  • 1 cup chilled sour cream
  • 1 cup chilled whipping cream
  • 1 cup powdered sugar, divided
Spiced Mango-Mojito Sauce
  • 2 large mangoes, peeled, pitted, diced
  • 6 tablespoons plain whole-milk yogurt
  • 4 tablespoons (or more) sugar
  • 3 tablespoons spiced rum
  • 1 tablespoon fresh Key lime juice
  • 1 1/2 teaspoons (packed) finely chopped fresh mint
Preparation:
Profiteroles:
Preheat oven to 375°F. Line 2 large rimmed baking sheets with parchment paper. Bring milk, butter, and salt to boil in heavy large saucepan over medium-high heat, stirring until butter melts. Add flour all at once. Reduce heat to medium and stir with wooden spoon until dough forms ball and some batter films bottom of pan thickly, about 4 minutes. Transfer dough to medium bowl and cool 5 minutes. Using electric mixer, beat in eggs and yolks 1 at a time.
Drop dough by generous tablespoonfuls 3 inches apart onto baking sheets, making about 24 puffs. Smooth tops with wet fingertips.
Bake puffs 15 minutes. Reverse sheets and bake puffs until deep golden, about 10 minutes longer. Make small slit in side of each puff. Return to oven, turn off heat, and let dry 15 minutes. (Can be made 6 hours ahead. Let stand at room temperature.)
 
Filling:
Stir mango and sour cream in medium bowl to blend. Beat whipping cream and 1/2 cup powdered sugar in large bowl until peaks form. Fold whipped cream into mango mixture. Cover bowl; refrigerate filling at least 30 minutes and up to 3 hours.
Cut cream puffs horizontally in half. Spoon heaping tablespoon filling into each bottom half; cover with tops. Sift remaining 1/2 cup powdered sugar over.
Divide cream puffs among 8 plates. Spoon sauce onto plates and serve.
 
Spicy Mango-Mojito Sauce
Purée mangoes in blender or processor until smooth. Transfer 1 1/2 cups purée to medium bowl (reserve remaining purée for another use). Mix yogurt, 4 tablespoons sugar, spiced rum, fresh lime juice, and chopped mint into purée. Sweeten sauce to taste with more sugar, if desired. (Can be made 1 day ahead. Cover and refrigerate.)

Secret Pickle Supper Club – A Delicious Surprise


Secret Pickle Supper Club

“Make sure you’re free on the 31st” D said to me several weeks ago. So, I promptly went in my calendar and blocked off the 31st.

Why? “It’s a surprise” he said. Hmm. A surprise. I thought about what it could be but then decided not to try and figure it out. I wanted it to really be a surprise. And in a million years, I would have never guessed. We arrived at the St. Lawrence Market at 7:30 PM sharp (did you know that the St. Lawrence market was recently elected by National Geographic to be the best market in the world!).

We were given waiver forms to fill out – apparently there would be cameras and if we didn’t want to be filmed, we had to be seated in certain areas. Now I really had no idea what we were there for. We get upstairs into the Market Kitchen –  a huge, open area with beautiful views of the Front Street Iron Building and the CN Tower. There is an open cooking area, and three large tables set with utensils and wine glasses. “Maybe we are here to watch a cooking show” I wondered. It certainly looked like a studio kitchen. We are greeted by a cheery lovely lady telling us to make sure we get a cocktail.

Secret Pickle Supper Club

Cocktail? Gin-Tonic Con Los Jarabes de Inspiración. The flavours? Paprika, Pink Peppercorn, Lavender Orange and Cardamom Orange. D was adventurous with Paprika (it made for a more interesting photo – above :))

Secret Pickle Supper Club

I went with Lavender Orange because I have been craving lavender lately – above.  One of these days I have to make some lavender sugar.

Secret Pickle Supper Club

At this point, I’m still wondering what is this event that we came to. I look at the tasting menu/information brochure – Secret Pickle Supper Club. Tonight’s theme: Tasting Tour of Spain.

Secret Pickle was founded by Alexa Clark when she held a tasting dinner for her birthday. From there, it evolved over time to what it is now – a tasting dinner party for up to 50 people, each with its own theme. The Secret Pickle usually happens in the city of Toronto at various locations and the tickets for the event sell out quickly. In honour of their 2 year anniversary, there was also a documentary being filmed, to be released later this year.

Secret Pickle Supper Club

The Chef, Matt Kantor prepared the delicious menu we were about to have and it was inspired by the Spanish meals him and Alexa had in Spain while at an olive oil conference.

First up – Croquetas de Bacalao Con Salsa Verde: Cod croquettes with banana pepper mayo and parsley puree. The Croquetas were browned until crispy on the outside. The parsley puree broke up the creaminess of the cod and it gave the plate a beautiful colour.

Secret Pickle Supper Club
The croquetas were brought around by the lovely servers and this was the only part of the meal that was served while the crowd was still mingling. The rest was a sit down dinner type meal, complete with an endless supply of Spanish wine.

The white wine: Leira Albarino from the Pazo Pondal Winery in Rias Baixas region of Spain (2008) was light, citrusy and with a hint of pear – perfect for the spring, with seafood or tapas.

The red: Pena Roble Crianza, from the Bodegas Resalte De Penafiel winery (100% Tempranillo grapes, 2004), from the Ribera Del Duero region. The red was my preferred choice for the evening, it was complex, well balanced with hints of fruits and chocolate. For Spain, 1994, 1995, 2001 and 2004 are the best vintages in history as they produced the very best Spain has to offer. Wines from those vintages can last for 20+ years when stored correctly.  We were supper lucky to have a 2004 served to us this evening!

Secret Pickle Supper Club

Next up, it was Lomo “Iberico” con Ajo y Perilla, which is a dish typical in the Andalusia region of Spain. Cutlet of pork, thinly sliced and pan fried with garlic and herbs. It was very simple, yet it was its simplicity that made it stand out.

Secret Pickle Supper Club

During the tasting we were also lucky to try two different olive oils. The first one was from Girona, from producers Bodegas Roda. Dauro was first launched in 1999 and it was the first Spanish olive oil produced as a ‘single estate oil’. It’s a blend of 3 varietals: Arbequina, Hojiblanca and Koroneiki. It’s considered delicate compared to other premium oils in Spain. According to my tasting notes, Dauro was minty, grassy and spicy. It smelled of avocado, nuts and tomato. The taste was quite delicate, smooth and well balanced. It lingered on the tongue long after swallowed. The oil was served in wine glasses and we were encouraged to taste the oil by itself first, then with bread, and then to save some to drizzle on our next course.

Secret Pickle Supper Club

The next course was Pulpo Loco from the Galicia region of Spain. “Crazy” octopus and fried potatoes. I’m usually not a big fan of octopus because it’s quite chewy and tasteless. However, the chef did a really good job grilling the octopus so it was a perfect consistency.

And….it was quickly gone!

Secret Pickle Supper Club

Next up we had Huevos con Patate, Maitake y Ramp – Sous Vide eggs with mashed potatoes with maitake mushrooms and ramps. Have you ever had sous vide eggs? If you’re like me, maybe you had sous vide meat, but never eggs. In fact, I didn’t even know that eggs could be ‘sous vide-ed’. According to the chef, the way to do it is to cook the eggs at exactly 63 degrees. The shells are then cracked on one end to let the egg fall out.

Secret Pickle Supper Club

This was something completely new for me, and even for someone that doesn’t like runny eggs, this was quite delicious. The mashed potatoes were creamy and the maitake mushrooms gave them a slight change in texture.

Secret Pickle Supper Club

The second choice for the olive oil was much richer. Tuccioliva Gran Selection from the San Amador Cooperative is made from Picual olives picked and pressed in October 2011. Tuccioliva was greener in colour (which apparently isn’t a characteristic on which olive oil should be judged), it was more bitter, longer aftertaste with hints of ripe fruit, banana and fennel.

Secret Pickle Supper Club

After this, we were served my favourite dish of the evening. Arroz Blanco y Negro Con Calamares, a dish most often found in Valencia.

Secret Pickle Supper Club

The calamari were first marinated in beet juice which gave them an incredible pink colour. The contrast of the pink against the black and white rice was incredible, as you can see from the pictures.

Secret Pickle Supper Club

A little sprinkle of Tuccioliva on top gave the rice a smooth finish. The calamari were perfectly cooked and my favourite were the little bubbles of moisture that formed on top 🙂

Secret Pickle Supper Club

Secret Pickle Supper Club

Before each meal, Alexa would give us a little background on her and Matt’s trip through Spain and how each meal was thought up and where the inspiration came from.

Secret Pickle Supper Club

At some point, she came around with a big plate of chorizo, and passed it around. Pure deliciousness. It reminded me of my own trip to Spain and how I much I miss chorizo and manchega cheese! 🙂

Secret Pickle Supper Club

Our last savoury dish of the evening was Cordero Con Mermelada de Pimientos del Piquillo – Slow roasted baby lamb with roasted red peppers. This dish was quite delicate, very clean and simple and a nice way to finish the savoury part of the meal.

Now you’re wondering what was for dessert, right? Our hosts chose Natilla, a typical custard-like Spanish dessert with cinnamon. The natilla was more liquidy than a typical custard, velvety smooth with a perfect cinnamon finish.

The evening ended with Alexa thanking us for coming and inviting us to the next events. I can’t wait for the documentary to come out (I hope they got my good angles :)).

Secret Pickle Supper Club

By far this was the best surprise I’ve ever gotten! What better way to get to a girl’s heart than with Spanish tapas? D even encouraged me to bring my camera, which is how all you fine people get to share in our experience 🙂 So, you have him to thank for that. And the best part? Time spent together. Until next time, happy eating!


UPDATE:  The Secret Pickle Supper Club Documentary is up and ready!  Check out yours truly in a few shots!  This is way too exciting! 🙂

Brunch Part 2: Avocado Pudding and Kale, Ricotta and Artichoke Tart


Continuing with the brunch theme, in this post I’ll feature avocado pudding and kale and artichoke ricotta tart. I must thank my dear Zirka for sending me the recipe for avocado pudding (see below and thank you Kitchn.com). When I think of pudding I think of something a bit on the heavy side and lots of sugar. But, this morning snack is anything but. The avocado is light and fresh, and a bit of milk and honey breaks up its creaminess to make for a light and delicious snack 🙂

You have to start off with ripe and soft avocados. This recipe is a good way to use up those old avocados that are overripe. I blended the avocado first and then addit a bit less than the recommended amount of milk, so I can control the consistency. The trouble with saying one avocado in the recipe is that the size of it matters. So, I would suggest blending the avocado first and then adding milk and honey little by little until you get the desired consistency.

The pudding should have a consistency of yoghurt – it should be able to hold its shape and not be too runny. I opted to top it with some granola, but nuts are also a good choice, for a change of texture.
As Zirka pointed out in her email, you can substitute coconut milk or even hemp milk for variety.

This kale, artichoke and ricotta tart is super easy to make. Again, I had a slight problem with the measurements recommended in the recipe. A bunch of kale is not specific enough for me, as the bunches can be different sizes. I followed the recipe but ended up with much more kaley tart than what I had intended. I also ended up having to use more eggs because there was so much kale.

I would suggest doing the egg and cheese mixture first and then adding kale in small quantities until you get the consistency you like. You may even have to add a few more eggs. Overall, the taste was good, but I think the kale overpowered the rest. Next time I will add the kale a bit at a time.

Regardless, these brunch additions were delicious. A great way to start your Sunday!

…………………………………………………………………………………………………………..

Click on each photo to view the high resolution images.

…………………………………………………………………………………………………………..

RECIPES

…………………………………………………………………………………………………………..

Avocado Pudding with Honey

  • 1 ripe avocado
  • 1/2 cup of milk
  • 1 TBS honey
  • 2-3 TBS of granola (or, as I used, crushed almonds)
Scoop avocado into a blender (or cusinart). Add 1/2 cup of milk. Add the honey and blend until smooth. Garnish with granola or almonds. You can also chill for about an hour for a refreshing coolness.

…………………………………………………………………………………………………………..

Kale, Ricotta and Artichoke Tart

  • Olive oil
  • 4 eggs, beaten
  • 8 ounces ricotta cheese
  • 4 ounces Parmesan, grated
  • 1 cup canned artichokes, chopped
  • 1 bunch kale, roughly chopped
Preheat oven to 400°F. Grease a 9-inch cake pan lightly with olive oil. In a large bowl, whisk together the eggs and cheeses. Roughly chop the veggies and add to the cheese/egg mixture. Stir until combined. Pour contents of bowl into the greased cake pan and cook until custard is set, about 40 to 50 minutes. Cool on a wire wrack for 5 to 10 minutes and serve.

…………………………………………………………………………………………………………..

These recipes are courtesy of: The Kitchn.com

Brunch Part 1: Organic Warm Quinoa with Toasted Nuts, Potato and Egg Skillet, and Coconut Granola


What is the best thing about Sunday morning besides sleeping in? For me, it’s the Sunday brunch. By now, most of us know brunch to mean a meal combining breakfast and lunch (as the portmanteau indicates), but I was curious about how this phenomenon started. The word brunch, or as the French like to call it “le grand petit déjeuner”, was coined in Britain in 1895 by a journalist G. Beringer, to describe a meal for Saturday-night carousers that would be a substitute for the British Sunday afternoon early dinner.  As Beringer describes in his article in Hunter’s Weekly: “By eliminating the need to get up early on Sunday, brunch would make life brighter for Saturday-night carousers. It would promote human happiness in other ways as well. Brunch is cheerful, sociable and inciting. It is talk-compelling. It puts you in a good temper, it makes you satisfied with yourself and your fellow beings, it sweeps away the worries and cobwebs of the week”

I find Beringer’s description to be spot-on. Brunch IS talk compelling, sociable and cheerful. Especially when the great food is shared with the people you love.

In spirit of brunch, the next two posts will feature some of brunch-type recipes that I have recently tried.

First up, organic red and yellow quinoa. I have only recently started making quinoa dishes as a result of something D wanted to try, and I must admit, I was pleasantly surprised. My dear friend Zirka has been making quinoa for a long time as a substitute for breakfast oatmeal, and introduced me to the different kinds. Red quionoa has a slightly more earthy and smoky flavour than regular yellow quinoa, which is more plain.  It’s also slightly more expensive. I thought it would be good to buy a bit of both and mix them together. The cooking time for each is the same, not to mention the colour palate is so much more exciting :). 

Quinoa can be made savoury as a side dish, but in light of brunch, I decided to make it as a morning cereal instead. The graininess and the texture of the quinoa is very filling and satisfying for a breakfast meal. I substituted maple syrup for agave and found that to work just as well. There can be many other substitutions made, such as the type of nuts or berries. All in all, I was very happy with the result and I’m excited to try many other different variations.

For the savoury part of the meal, I thought a skillet bake would be good. I must admit that this recipe didn’t go as well as I had planned. This may have been partly to the fact that I had grated the potato and onion and then soaked it in water to prevent it from browning while I prepared other things. In retrospect, the potatoes really need to very very dry, otherwise they won’t get nice and crispy in the skillet.

For me, the really interesting and pretty thing about this recipe was the variety of colours and how vibrant the cracked egg looked on top of the crispy potatoes.  I just love that bright yellow colour 🙂

The potatoes eventually lost their moisture and started to crisp up but not before they slightly burned, so this was definitely a lesson for next time. Regardless, the bake was still delicious, albeit not to my crazy standards for prettyness. I guess you can judge for yourself 🙂

Going back to grains, I decided to also add the staple to this brunch round-up :). Granola. So versatile and so easy to make. One can pretty much put anything one wants into her granola and experiment with different ingredients until perfect. I used a simple recipe but also added a few more types of nuts for variety.

The granola can keep for up to 2-3 weeks in an airtight container.

I like to have my granola with plain, no-sugar added yoghurt. My favourite brand is the Astro Balkan Style 6% kind. Greek yoghurt is also good.  If one doesn’t want all the fat of the Greek yoghurt, but like its smoothness and creaminess, one option is to drain the plain yoghurt overnight.  This leaves all the liquid out and you get a thicker, creamier version :).   I find that the plain yoghurt adds freshness and breaks up the sweetness of the granola. One may like to add a drizzle of honey or even olive oil for additional sweetness and flavour. Berries are always a good addition and a nice change in texture.

Stay tuned for the second part of Brunch: I will be featuring avocado pudding and kale and artichoke breakfast tart. Yummo! Until then, toodles! 🙂

…………………………………………………………………………………………………………..

Click on each photo to view the high resolution images.

…………………………………………………………………………………………………………..

RECIPES

…………………………………………………………………………………………………………..

Warm Quinoa with Berries and Roasted Pecans

  • 1 cup organic 1% low fat milk (I used 3.25% milk for creamier quinoa)
  • 1 cup water (this can also be replaced by more milk for more creamier quinoa)
  • 1 cup organic quinoa, (rinse quinoa before boiling)
  • 2 cups fresh berries
  • 1/2 teaspoon ground cinnamon
  • 1/3 cup chopped pecans, toasted*
  • 4 teaspoons organic agave nectar ( I substituted maple syrup) 
 
Combine milk, water and quinoa in a medium saucepan. Bring to a boil over high heat. Reduce heat to medium-low; cover and simmer 15 minutes or until most of the liquid is absorbed. Turn off heat; let stand covered 5 minutes. Stir in blackberries and cinnamon; transfer to four bowls and top with pecans. Drizzle 1 teaspoon agave nectar over each serving.
Serves 4.
*While the quinoa cooks, roast the pecans in a 350F degree toaster oven for 5 to 6 minutes or in a dry skillet over medium heat for about 3 minutes.

……………………………………………………………………………………………………………

Hash Brown Eggs

  • 1 cup grated potato
  • 1 cup grated onion
  • 1-2 tbsp butter
  • 1/2 cup cheddar cheese
  • 2 eggs
  • chopped red pepper and green onion for garnish
 
Fry 1 cup each chopped onion and grated potato in a cast-iron skillet with butter until crisp. Add 1/2 cup grated cheddar and crack in 2 eggs. Bake at 425 degrees F until set; top with green onion and red pepper.

……………………………………………………………………………………………………………

Homemade granola with Coconut, WheatGerm and Honey

  • 5 cups rolled oats
  • 1 cup blanched slivered almonds
  • 1 cup chopped walnuts
  • 1 cup chopped pecans
  • 1 cup sesame seeds
  • 1 cup wheat germ
  • 2 cups shredded coconut
  • 1 cup unsalted sunflower seeds
  • 1 cup canola oil
  • 1 1/2 cups honey
  • 1 cup raisins (you can get some golden some sultan raisins for colour)
  • 1 cup dried cranberries
I added some peanuts, cashews and pumpkin seeds. 
Preheat the oven to 325 degrees F (165 degrees C).
In a large bowl, stir together the oats, almonds, walnuts, pecans, sesame seeds, wheat germ, coconut and sunflower seeds. In a small pan over medium heat, stir together the oil and honey. Cook and stir until blended. You could also do this in a large measuring cup in the microwave, heating for about 2 minutes and 30 seconds. Pour over the oat mixture, and stir to coat evenly. Spread out in an even layer on two cookie sheets.  The layer should be thin to prevent uneven baking.
Bake for 20 minutes in the preheated oven, until the oats and nuts are toasted. Immediately after it comes out of the oven, stir in the raisins and dried cranberries. Let stand until cooled, and stir again to break up any large clusters.

Tapas Weekend, with Farmer’s Market Salad and Hazelnut Shortbread with Chocolate


Tapas. My new favourite style of dinner. Simple to prepare, lots of variety, and a great way to try a little bit of everything 🙂
A preferred way to have meals in Spain, as well as some parts of the US and the UK, tapas (from Spanish word tapar meaning ‘to cover’) are meant to encourage socializing and conversation, with no pressure to finish a big meal.

It all started on Friday when our little group got together for dinner and somewhere along the way it was decided that it would be tapas style: different cheeses, spreads, fresh bread, olives, and best of all, Stan’s famous mussles in cream sauce, Christina’s garlic shrimp, DVG’s crostini with goat cheese, prosciutto and cranberry sauce and my crostini with cheddar, pear and walnuts.

I would say one of the most important parts of having good tapas is fresh bread. For Friday, we visited the new German Bakery in Uptown – German Baked Specialities, and got some fresh baguette for the crostinis and rye with corn flour crust for dipping.  Another important ingredient for tapas is good olive oil. Sometimes, all one needs is good quality olive oil and balsamic vinegar for dipping with fresh bread!

There is something magical about old friends coming together after not seeing each other for a while, and picking up right where they left off. Conversation is flowing, the food is dissapearing and the wine bottles are getting empty.  Before you know it, you have been chatting and eating for hours! Is there anything better in the world than great friends, great food and great wine?

Aged and young gouda, double creme brie, aged cheddar, chevre, olives, pears, sausages, smoked trout…

Inspired by the success of Friday night tapa’s dinner, DVG and I decided to have a repeat of it on Sunday evening. Again, we went all out, put the whole spread on my new serving board from Argentina (horse shoes for handles?! So cool!), made different versions of crostinis and at 22h, dinner began!

We discovered we had some aged white cheddar in the fridge, and had initially intended to melt it with pear, but after tasting it, we realized it was too delicate and delicious to melt, so instead we cut up the remaining pear and had it fresh with the aged cheddar.  Such a great combination!

All that cheese and bread, we had to had some greens to balance out the ‘food equation’ 🙂  I found that the quickest way to make a delicious dressing is to mix olive oil, balsamic vinegar, dijon mustard and salt and pepper in a mason jar and cover some baby spinach or arugula with it.  The roasted red peppers add a splash of colour and a different texture to the salad.

DVG proved to be a great model for my photo whims, even having enough patience for my meticulous framing, and that’s saying a lot especially because we were both famished and tired from climbing!

The rest of Sunday afternoon was spent preparing a salad and cookies for a dinner party hosted by my mom.  My mom is an excellent cook – she whips up meals in what seems like seconds, and they are always delicious.  I consider her culinary skills far superior to my own.  And yet, sometimes when she is hosting dinner parties she asks me to prepare something ‘delicious’ and ‘decorative’, to impress her guests.  Even though, whatever she prepares is sure to be yummier :).  But, I take this as a compliment, and oblige whenever she makes such requests.

A few weeks ago, while searching for a different recipe, I came upon this one for Farmer’s Market Salad, and judging by the ingredients, it seemed like a very interesting combination of flavours.  There is roasted squash, walnuts and arugula, the most interesting was pomogranate seeds, and pomogranate molasses.  Tanginess of the pomogranate seeds was a great compliment to the caramelized squash, crunchiness of walnuts and lightness of the arugula.

Even though recipe didn’t call for this, I broiled the squash a bit after roasting it to get the charred tops, and also added fresh rosemary to the squash before roasting for extra flavour. 

The dressing for this salad is super simple – orange juice, lemon juice and walnut oil (or any other type of nut oil), seasoned with salt and pepper.  I liked the acidity of the juices combined with the smooth taste of the oil, it gave the salad a fresh and light taste.  The recipe also calls for the salad to be topped off by pomogranate molasses.  Apparently, this can be found in some supermarkets, but I failed to find it, so instead I improvised.  Half the pomogranate was seeded for the salad and half was seeded to make a sauce (a makeshift molasses if you will).  I really didn’t quite know what I was doing here, but I tried to reduce the juice from the seeds to a sauce and added some regular molases and butter.  The sauce turned out ok, but I don’t know how it compares to the real thing.

For dessert, I decided to make these simple hazelnut shorbreads that are especially decorative because they’re half dipped in chocolate.  I find them to be super easy to make, and always a hit.  They are soft and crumbly and the creamy chocolate taste is a nice contrast to the dryness of shortbread.

I would recommend shaping these on the smaller side before you bake them (about the size of half of your finger), because they grow, and they are much more decorative if they are smaller.

Another tip, which may seem obvious, but it wasn’t to me when I first made these, is to transfer the melted chocolate into a deep container with a bigger opening ( a mug would work) as this makes it easier to dip the shortbread at the right angle.

…………………………………………………………………………………………………………..

Click on each photo to view the high resolution images.

…………………………………………………………………………………………………………..

RECIPES

…………………………………………………………………………………………………………..

Farmer’s Market Salad

Ingredients:
  • 4 1/2 to 5 cups 1/2-inch cubes peeled seeded butternut squash (from about one 2-pound squash)
  • 2 tablespoons extra-virgin olive oil
  • Pinch of dried crushed red pepper
  • Coarse kosher salt
  • 2 tablespoons orange juice
  • 1 1/2 tablespoons walnut oil or other nut oil
  • 1 1/2 teaspoons fresh lemon juice
  • 4 ounces arugula (about 8 cups lightly packed)
  • 1/2 cup walnuts,toasted, coarsely chopped
  • 1/2 cup pomegranate seeds
  • 2 teaspoons pomegranate molasses*
Preheat oven to 450°F. Toss squash, olive oil, and crushed red pepper on large rimmed baking sheet. Sprinkle with coarse salt. Roast 15 minutes. Using spatula, turn squash over. Roast until edges are browned and squash is tender, about 15 minutes longer. Sprinkle with coarse salt. DO AHEAD: Can be made 2 hours ahead. Let stand at room temperature.
 
Whisk orange juice, walnut oil, and lemon juice in large shallow bowl. Season to taste with salt and pepper. Add arugula, walnuts, and pomegranate seeds; toss to coat. Season to taste with coarse salt and pepper. Spoon warm or roomtemperature squash over salad. Drizzle with pomegranate molasses and serve.
 
* A thick pomegranate syrup; available at some supermarkets and at Middle Eastern markets
…………………………………………………………………………………………………………..
 

Chocolate Dipped Hazelnut Shortbread

Ingredients:
  • 1 cup husked hazelnuts
  • 1 cup all purpose flour
  • 1/2 teaspoon baking powder
  • 1/2 teaspoon salt
  • 8 tablespoons (1 stick) butter, room temperature
  • 1/3 cup sugar
  • 1 egg
  • 1 teaspoon vanilla extract
  • 4 ounces good-quality semisweet chocolate
Preheat oven to 350 degrees F.
 
Place hazelnuts on baking sheet. Bake until they’re a shade darker and fragrant, about 10 to 15 minutes. Remove from oven and set aside to cool.
 
Lower oven to 325 degrees F.
 
Place hazelnuts in blender or food processor and pulse to coarse bits; set aside. Whisk together flour, baking powder, and salt to blend; set aside.
 
Beat butter and sugar together with a wooden spoon until smooth. Beat in egg. Gradually beat the flour mixture into the butter mixture. Add the chopped hazelnuts and mix until distributed evenly throughout.
 
 Form into finger sized logs, about 1 1/2 to 2 tablespoons dough each, and place on greased cookie sheets. Bake until firm, about 15 minutes. Remove from oven and cool on racks.
 
In a saucepan over lowest heat or in a double broiler, melt chocolate. Dip 1 end of cooled cookies into melted chocolate. Place back on cookie sheet to harden.
 

Triple Chocolate Truffle Tart with Raspberries for Mom


“How old are you today, mom?” 56 she says. And adds how she’s getting old. But then later that day she calls in a panic that she miscounted and really she’s 57! “I’m old” she says. I start laughing.  My mom is cute.   And always brutally honest.  But that’s part of her charm – at least one always knows how she really feels :). Once she mentioned that no one has ever baked her a cake of any sort for her birthday. And I thought to myself, that’s not right – my dear mommy deserved better than that :).   So, instead of traditional cake, I decided to make her a tart.

The Triple Chocolate tart is just that – very chocolatey, cocoa is baked into the crust and the filling is a mixture of white and dark chocolate. The tarness and slight sourness of the raspberries break up the sweetness of the chocolate and balance out the sugar in the tart and add a fresheness to it.

I found scotch to be a good combination to sip along with this tart, and you can even go as far as to infuse the raspberries into the scotch.

After the crust is baked, and raspberries are set on the bottom of the tart, the chocolate mixtures are poured over and have to set for a few hours. I found the white chocolate took longer to set. Needless to say, the tart has to be refrigerated and covered so that the crust doesn’t dry out. I found the crust to be challenging to spread out, it was breaking and it needed a lot of flour to keep it from sticking. The parchment paper really helps in transferring from the board to the tart pan – definitely a good investment that parchment paper! 🙂

We put one single candle into the tart for my mom to blow out (we didn’t want to remind her how old she actually was :)).  She was so happy to have the whole family there – she always complains how we don’t spend enough time together and how we don’t talk enough. I was just happy that I fulfilled a long-time wish of hers and that the tart actually turned out.

It feels like forever ago that I’ve baked something and I almost forgot how great it feels to look at the finished product and even better to photograph it. Not to mention the incredible smell that fills my entire house 🙂
Until next time, toodles!

…………………………………………………………………………………………………………..

Click on each photo to view the high resolution images.

…………………………………………………………………………………………………………..

RECIPE

…………………………………………………………………………………………………………..

Triple Chocolate Truffle Tart with Raspberries

Chocolate Pastry:
  • 1 cup (250 mL) flour
  • 1/4 cup (50 mL) cocoa
  • 3 tbsp (45 mL) granulated sugar
  • 1/2 cup (125 mL) unsalted butter
  • 3 tbsp (45 mL) orange juice
Filling:
  • 1 1/4 cups (300 mL) whipping cream
  • 3 oz (90 g) white chocolate
  • 8 oz (250 g) bittersweet chocolate, chopped
  • 2 tbsp (25 mL) butter
  • 2 cups (500 mL) raspberries
 
  1. In a food processor, gently combine flour, cocoa, sugar and butter until mixture is just crumbly. Add enough orange juice for mixture to come together. Remove from food processor and form into a ball. Flatten slightly, wrap in plastic wrap and refrigerate for 30 minutes.
  2. Remove pastry from refrigerator and roll out on floured board until 1/4-inch (5-mm) thick. Place in 10-inch (25-cm) tart or flan pan with removable bottom or four 4-inch (10-cm) individual tart tins. Prick base.
  3. Place a sheet of parchment paper or foil over pastry and weight with beans or rice. Bake at 350ºF (180ºC) for 10 minutes, remove beans and rice and bake for another 10 to 15 minutes or until cooked through. Cool.
  4. For filling: bring cream to boil in a medium pot. Remove from heat and remove 1/2 cup (125 mL) cream to another bowl. Stir white chocolate into the cream in bowl and bittersweet chocolate into the pot. Stir until chocolates are melted. Stir 2 tsp (10 mL) butter into white chocolate and remaining into dark chocolate. Reserve.
  5. Scatter raspberries over the bottom of tart shell. Pour over dark chocolate cream. Swirl through white chocolate cream. Garnish with more raspberries, if desired. Chill to set slightly.